Requirements前提条件
- USB Drive: USB 2.0, max 32GB, formatted as FAT32 (MBR partition table) U 盘:USB 2.0,最大 32GB,格式化为 FAT32(MBR 分区表)
- Your APIM Serial Number (8 characters, found in SYNC system info) 您的 APIM 序列号(8 位字符,在 SYNC 系统信息中查看)
- Ford SYNC 2 firmware version 3.10 or later Ford SYNC 2 固件版本 3.10 或更高
-
Get APIM Serial Number获取 APIM 序列号
On your SYNC 2 screen: Menu → Settings → General → About SYNC. The serial is an 8-character alphanumeric string (e.g.
VH71AB2C). Note: the letterOis never used. 在 SYNC 2 屏幕上:菜单 → 设置 → 通用 → 关于 SYNC。序列号为 8 位字母数字组合(如VH71AB2C)。注意:序列号中不使用字母O。 -
Build Package构建安装包
Go to the Build tab on this website, enter your APIM serial number, select the apps you want, complete the CAPTCHA, and click Build Package. When the build completes, the ZIP file will download automatically. 切换到本网站的"构建"页,输入 APIM 序列号,选择所需应用,完成人机验证后点击"构建安装包"。构建完成后 ZIP 文件将自动下载。
-
Prepare USB Drive准备 U 盘
Format the USB drive as FAT32 with MBR partition table. Extract the downloaded ZIP file to the root of the USB drive. You should see the following structure: 将 U 盘格式化为 FAT32(MBR 分区表)。将下载的 ZIP 文件解压到 U 盘根目录,应看到以下结构:
USB Drive
└── SyncExtPack/
    ├── Installer.jpg
    ├── pack_install.bin
    ├── update.bin
    └── UpdateInstaller.dll
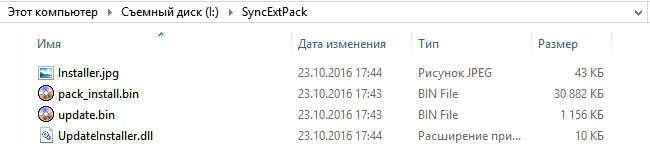 USB drive root (left) and SyncExtPack folder contents (right)U 盘根目录(左)与 SyncExtPack 文件夹内容(右)
 -
Trigger Installer via Wallpaper Menu通过壁纸菜单触发安装器
Start your vehicle and wait for SYNC 2 to fully boot. Remove all other USB devices, then insert the prepared USB drive. Navigate to: Settings → Display → Edit Wallpaper. A format notice will appear — press OK. 启动车辆,等待 SYNC 2 完全启动。拔除所有其他 USB 设备,插入准备好的 U 盘。进入:设置 → 显示 → 编辑壁纸。弹出格式提示框后按 OK。
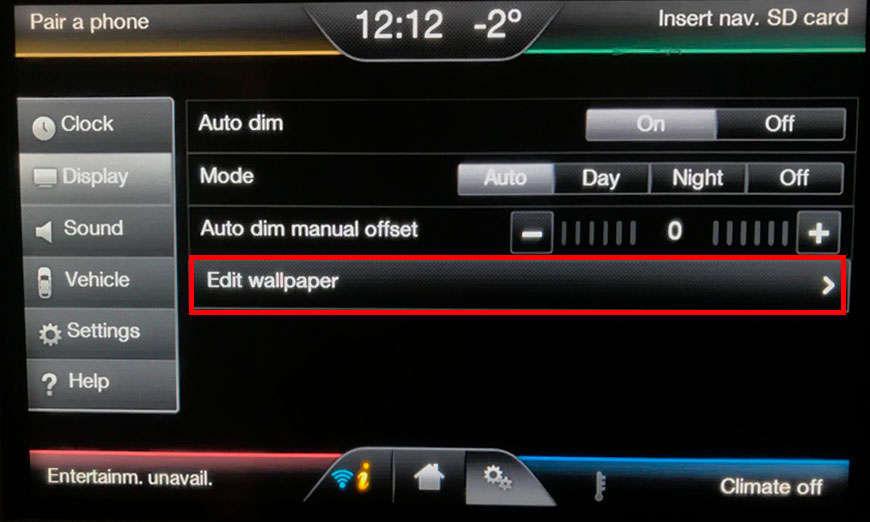
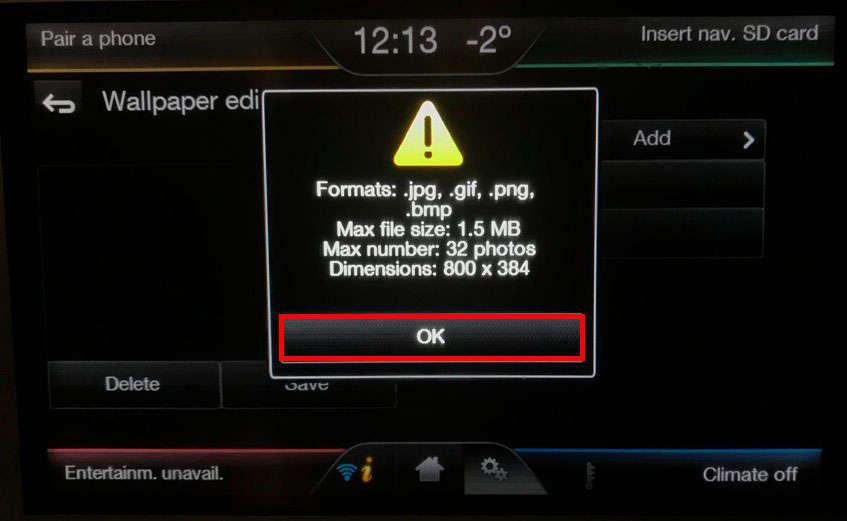
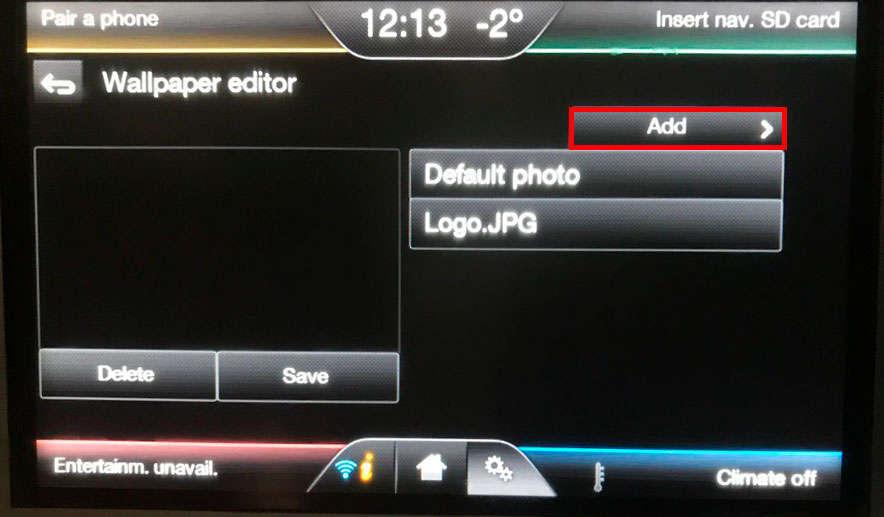 Display settings → Edit Wallpaper → format notice → Add button显示设置 → 编辑壁纸 → 格式提示 → Add 按钮
 -
Select Installer.jpg选择 Installer.jpg
Press Add, select USB1 as the source, then browse to the
SyncExtPackfolder and selectInstaller.jpg. Do NOT set it as wallpaper — just click it once and wait. The system will automatically reboot within about one minute. 点击 Add,选择 USB1 作为来源,浏览到SyncExtPack文件夹并选择Installer.jpg。切勿将其设为壁纸——只需点击一次并等待。系统通常在一分钟内自动重启。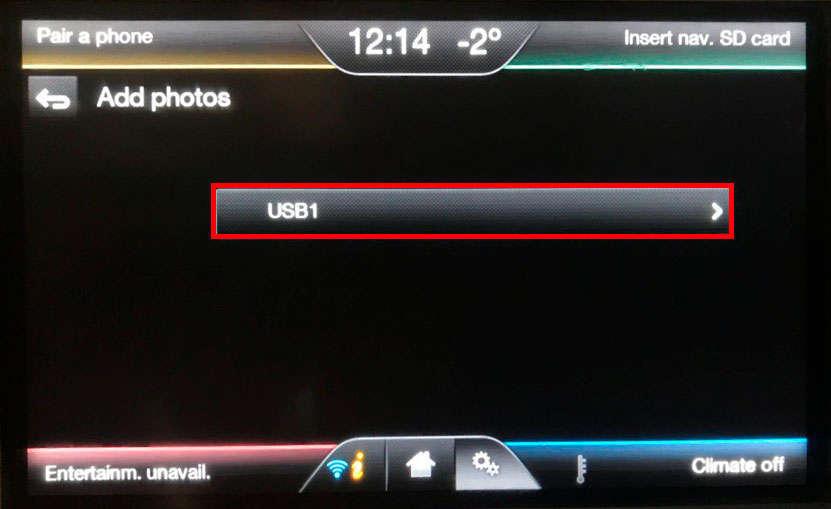
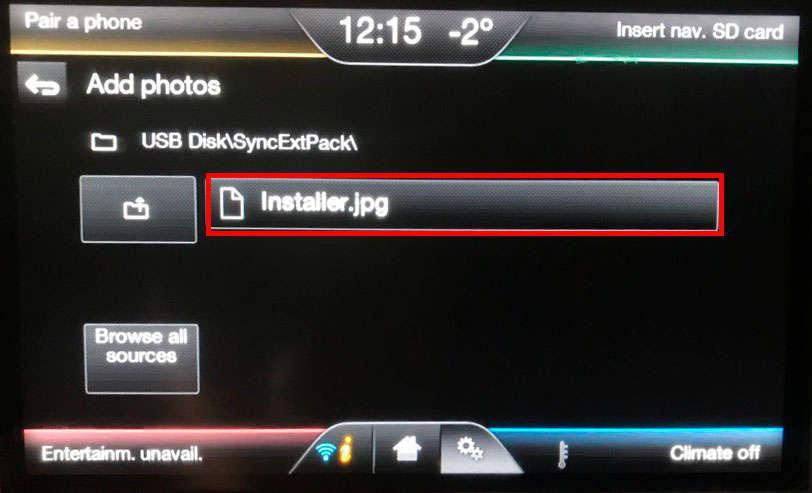 Select USB1 → SyncExtPack → Installer.jpg选择 USB1 → SyncExtPack → Installer.jpg
 -
Wait for Reboot等待重启
After the system reboots, wait for the Ford logo screen and then the full SYNC 2 boot to complete. Do not remove the USB drive yet. 系统重启后,等待福特标志画面和 SYNC 2 完全启动完成。此时不要拔出 U 盘。

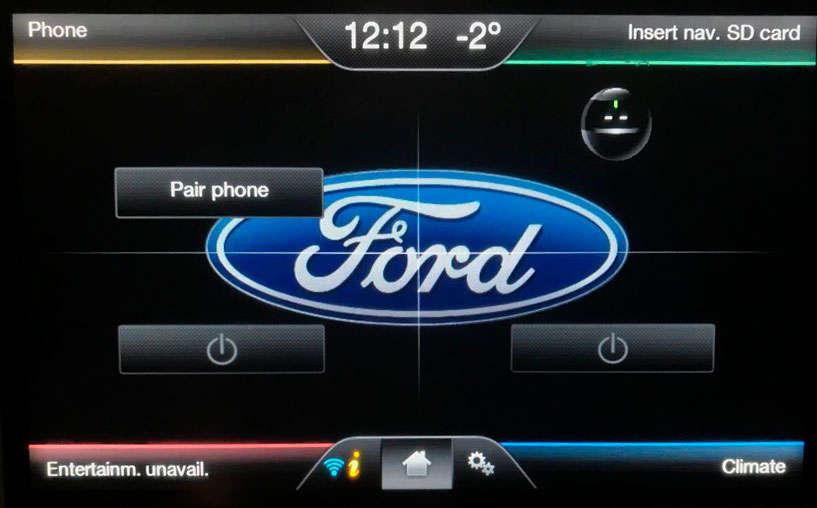 Ford logo boot screen → SYNC 2 home screen福特标志启动画面 → SYNC 2 主界面
 -
Rename and Reinsert USB重命名文件并重新插入
Now remove the USB drive and connect it to your PC. Open the
SyncExtPackfolder and renamepack_install.bintoinstall.bin. Then reinsert the USB drive into the vehicle. 现在拔出 U 盘连接到电脑。打开SyncExtPack文件夹,将pack_install.bin重命名为install.bin。然后将 U 盘重新插入车辆。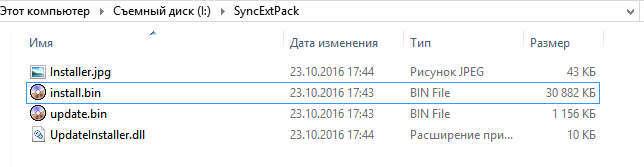

 Rename pack_install.bin → install.bin, then installation starts automatically重命名 pack_install.bin → install.bin,安装自动开始
 -
Installation Completes安装完成
The Update Installer window will appear and show progress. When installation finishes, the window will close automatically or the system will reboot. After full boot, remove the USB drive. Update Installer 窗口将弹出并显示进度。安装完成后,窗口将自动关闭或系统将重启。完全启动后,拔出 U 盘。
-
Verify Installation验证安装
Wait for SYNC 2 to fully boot. Press the
ibutton → Apps. Check that your newly installed apps appear in the list. 等待 SYNC 2 完全启动。按i按钮 → 应用。检查新安装的应用是否出现在列表中。